PRODUCT RECEIPT CARD
Receipt
of the products to be manufactured and manufacturing expenses are defined
in this section.
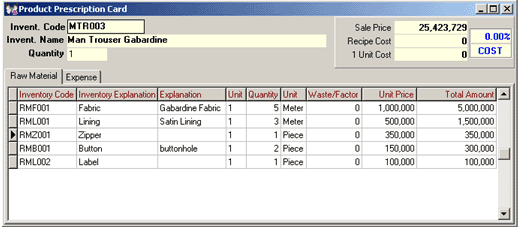
Figure 1 Product Receipt Card
You can pass into the fields on the receipt card with the
TAB key by entering the inventory code of the product that the receipt
will be defined for in the Inventory Code field. In another way,
the relevant inventory is selected among the inventory cards list displayed
on the screen by either pressing the F9 key or clicking the list
button.
If any card is not opened for the relevant product yet, an inventory card can be defined for the product at the displayed inventory card window by either clicking on the card button or pressing on the SHIFT+F9 key combination without leaving the prescription card screen.
Name of the selected product is transferred from the inventory card automatically to the Inventory Name field.
First, the general definitions in relation to the products, for which the receipts will be defined, are defined. Then, raw materials and semi-finished goods to be used in the manufacturing of the product are defined in the Raw Material window of the receipt card, while the manufacturing expenses are defined in the expenses window.
This
is the section, where raw materials and semi-finished goods that are used
in the manufacturing of the product are defined.

Figure 2 Product Receipt Card / Raw Material Tab
Inventory Code
You can pass into the other fields with the TAB key by
entering the inventory code of the raw material that will be used in manufacturing.
In another way, the relevant inventory is selected among the inventory
cards list displayed on the screen by either pressing the F9 key or clicking
the list button.
If the relevant raw material or semi-finished goods inventory is not defined
beforehand, the inventory can be defined at the inventory card window
displayed on the screen by either pressing the SHIFT+F9 key combination
or clicking the card button in this field.
Inventory Explanation
Inventory name of the selected raw material that was defined
in the inventory card is displayed automatically on this field.
Unit
The first unit that was defined in the raw material inventory
card is displayed as default in this field. The unit in relation to the
Selection window is selected among the list according to the inventory
unit that the manufacturing consumption is realized with.
Explanation
Required general explanation is entered into this field.
Quantity
Quantity of the raw material that is used to manufacture
one unit of the product is defined into this field.
Waste/Factor
Manufacturing waste for the raw material according to the definition in
the Unit field is entered into this field.
Unit Price
Unit price for the selected unit of the raw material is defined in this
field.
Total Amount
Total amount for the raw material is displayed on this field automatically
as the multiplication of the amount in the unit price field and the amount.
During the manufacturing operation of the product, required consumption
for the total manufacturing amount is calculated automatically by the
program on the basis of unit manufacturing consumption that was defined
in the receipt card.
Therefore, raw material usage amounts and waste that are defined on the
product receipt card are defined for only one product.
EXPENSE
TAB
General
manufacturing expenses in relation to the manufacturing of the product
are defined in this window.

Figure
3 Product Receipt Card / Expenses Tab
Expense
Type
Expense type concerning the manufactured product cost is
defined in this field. There is no need to make any card definition for
expenses concerning the manufacturing of the product. All manufacturing
expenses required on the basis of products can be defined on the Receipt
Card.
Accounting Code
You can pass to the other fields with the Tab key after
entering the accounting account code concerning the defined manufacturing
expense in this field. Alternatively, the relevant account is selected
from the account plan list displayed by either pressing the F9 key or
clicking the list button.
If there has not been any definition for the relevant account, yet, definitions
can be made on the account plan list displayed by either clicking on the
card button or pressing on the SHIFT+F9 key combination without leaving
the prescription card.
Amount of the expense that will affect the cost can be defined in
two ways in this field.
Share of the defined manufacturing expense in the cost
of the unit production in percentage is entered into the Percentage
(%) field. Costs are calculated directly from the raw material costs
with the expense percentage entered into this field.
Cost of the defined manufacturing expense in unit production is entered
into the Expense Amount field.
Percentages and costs of the manufacturing expenses that are defined on
the product prescription card should be defined for one product only.
RECEIPT CARD OPERATIONS
By
entering the code of the product subject to change into the receipt card,
the other fields are opened. Alternatively, receipt details are displayed
by selecting the relevant product from the Inventory Cards List displayed
on the screen by either clicking the list button or pressing the F9 key.
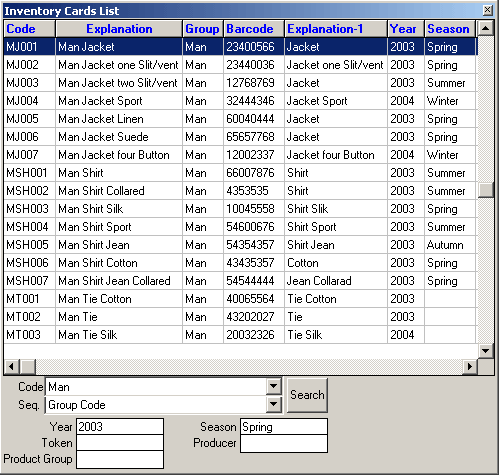
Figure
4 Inventory Cards List
After
making the required change on the receipt card, it is saved by either
clicking the record button or pressing the F5 key.
Other
fields are opened by entering the code of the product to be deleted into
the receipt card. Alternatively, receipt details are displayed by selecting
the relevant product from the Inventory Cards List displayed on the screen
by either clicking the list button or pressing the F9 key
in the product code field. Cancellation operation of the product, of which
receipt details are displayed on the screen, is executed by either clicking
the delete button or pressing the F6 key.
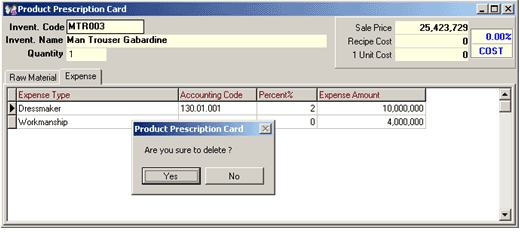
Figure 5 Product Receipt
Card Cancellation
Only raw material consumption amount and manufacturing expense details that are defined on the receipt card of the product are deleted at the receipt cancellation operation. Product inventory and raw material inventory cards are not deleted with the delete operation on the receipt card.
| Receipt card of any product that was manufactured cannot be deleted in the SentezShop program. (The product to be deleted should be non-manufactured, yet) |
DISPLAYING INVENTORY STATEMENT
Statement
of a required inventory can be displayed in the product receipt card.
Statement of the relevant inventory is displayed by either clicking the
statement button or pressing the SHIFT+F4 key combination
on the receipt card screen. Date limitations cannot be made on the inventory
statement displayed from the product receipt card menu. All transactions
of the account from the first to the last are followed.
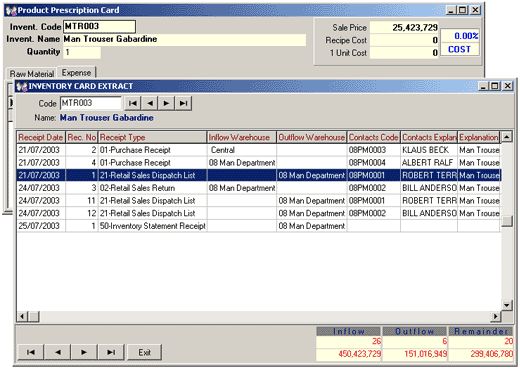
Figure
6 Product Receipt Card / Inventory Card Statement
Statement can be displayed by either entering the code of a different inventory or accessing to the other relevant inventories with the forward backward buttons in the Inventory Code field of the statement displayed on the prescription card.
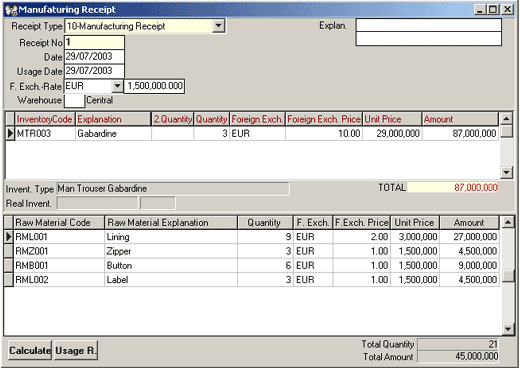
This
is the section, where manufacturing, consumption or waste entries of the
products that the receipts are defined for are executed.
Şekil 7
Figure 7 Manufacturing Receipt
Receipt Type
Receipt type manufacturing can be executed as either consumption or waste.
Click on the selection window, and select one of the following
options: Manufacturing Receipt, Consumption Receipt and Waste
Receipt.
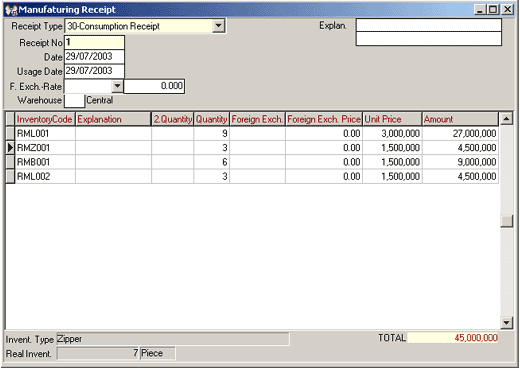
Figure 8 Manufacturing Receipt (Consumption Receipt)
Receipt No
Receipt numbers are displayed automatically according to the receipt types.
Therefore, receipt numbers cannot be changed.
Date
Date, when the consumption or waste entry of the manufacturing of the
product is executed, is entered into this field. Date of the present day
is displayed as default. If required, a different date can also be entered.
Usage Date
Date, when consumption of the raw material used in the manufacturing of
the product is executed, is entered into this field. Date of the present
day is displayed automatically. If required, a different date can also
be entered.
Explanation
General explanation in relation to the executed manufacturing operation
is entered into this field.
Warehouse
After entering the warehouse that the manufacturing of the product is
executed, you can pass to the other fields by the Tab key. Alternatively,
the warehouse is selected from the warehouse card list displayed by either
pressing the F9 key or clicking the list button. If any card is not opened
for the relevant warehouse, the warehouse can be defined in the manufacturing
receipt by either pressing the SHIFT+F9 key combination or clicking on
the card button.
Inventory Code
After entering the code of the product to be manufactured, you can pass
to the other fields by the Tab key. Alternatively, the relevant product
can be selected from the inventory cards list displayed on the screen
by either pressing the F9 key or clicking the list button. If any receipt
is not defined for the product to be manufactured, receipt can be defined
for the product in the manufacturing receipt by either clicking on the
card button or pressing on the SHIFT+F9 key combination.
Inventory Type
Name of the selected product that was defined in the inventory card is
displayed automatically in this field.
Unit
The unit in relation to the Selection window is selected among the list
according to the inventory unit that the manufacturing consumption is
realized.
Explanation
Required explanation is entered into this field on the basis of rows.
Quantity
Manufacturing quantity of the product is entered into this field.
Unit Price
Unit price of the product subject to manufacturing is entered into this
field.
Amount
Amount of the product is displayed automatically in this field by multiplying
the values entered into the Unit Price and Amount fields.
After making the necessary definitions for the product to be manufactured,
manufacturing operation is executed automatically by clicking the Consumption
button that is on the lower left hand side of the receipt screen in the
product code field.
When the manufacturing is executed, unit and total costs, and consumption
amounts of the raw materials that were defined in the product receipt
card are displayed automatically on the raw material fields at the lower
part of the receipt screen.
When the manufacturing is executed automatically, the product inventory
increases as much as the manufacturing amount. Raw material inventories
defined in the product receipt card is consumed automatically.
|
In order the raw material that was defined in the product receipt card to be consumed automatically, Auto Generate Consumption Receipt on Manufacturing parameter should be confirmed with the Yes option in the SentezShop Manufacturing Parameters. |
|
|
In order the manufacturing process to be continued even if the raw material inventories are not at sufficient levels for manufacturing, Proceed on Manufacturing in Case of Insufficient Raw Material parameter should be confirmed with the Yes option in the SentezShop Manufacturing Parameters. |
MANUFACTURING RECEIPT OPERATIONS
RECEIPT LIST and RECEIPT SELECTION
List of the manufacturing receipts can be
displayed on the manufacturing receipt screen. Transition from the list
to the receipts is possible.
Manufacturing receipts list is displayed by making the necessary limitations
on the Manufacturing Receipts Filter displayed on the screen by
either pressing the F9 key or clicking on the list button in either
the Date or Receipt No fields that are in the manufacturing
receipt screen.

Figure 9 Manufacturing Receipt / Inventory Receipts
List
Manufacturing receipt that is required to transfer into
the receipt screen is selected from the manufacturing receipts list displayed
by either double clicking or pressing the ENTER key.
|
Only the receipts from the receipt type defined on the receipt screen are listed on the receipt lists displayed on the receipt screen. |
All manufacturing receipts can be copied
row by row in the SentezShop program.
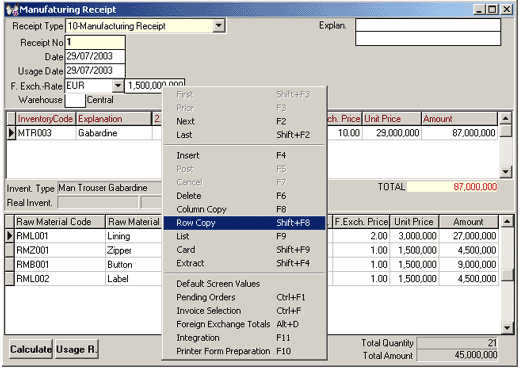
Figure 10 Manufacturing Receipt Menu
After displaying the manufacturing receipt to be copied on the screen, either press the SHIFT + F8 key combination or right click the mouse on the receipt screen. Copy operation is executed by selecting the Copy option from the operations list displayed on the screen and clicking on a blank row.
LINE DELETE AT THE MANUFACTURING RECEIPT
In
order to delete a line on a manufacturing receipt entry, either press
the F6 key or click the delete button on the line to be
deleted. The program displays a warning to prevent any mistakes as the
following: Are You Sure to Delete? If this warning is confirmed
with the Yes option, line delete operation is executed.
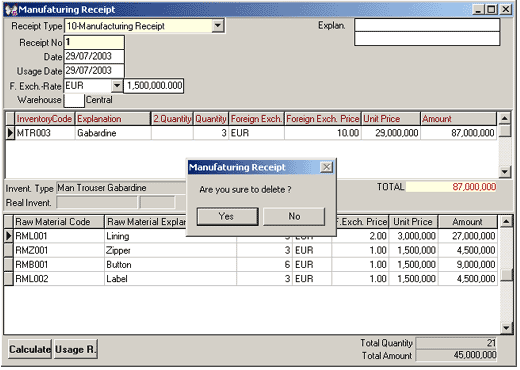
Figure 11 Manufacturing Receipt Line Delete
MANUFACTURING RECEIPT CANCELLATION
In
order to delete a manufacturing receipt entry completely, receipt delete
operation can be executed by either pressing the F6 key or clicking the
Delete button after displaying the relevant receipt. The program
displays a warning to prevent any mistakes as the following: Are You
Sure to Delete Complete Receipt? If this warning is confirmed with
the Yes option, receipt delete operation is executed.
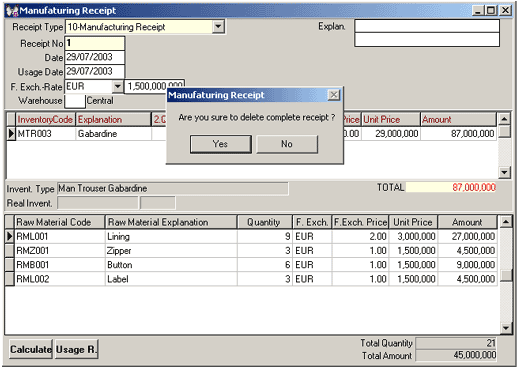
Figure 12 Manufacturing Receipt Delete
DISPLAYING INVENTORY STATEMENT AT THE MANUFACTURING RECEIPT
Statement of any inventory required can be
displayed on the manufacturing receipt in the SentezShop
program without leaving the receipt.
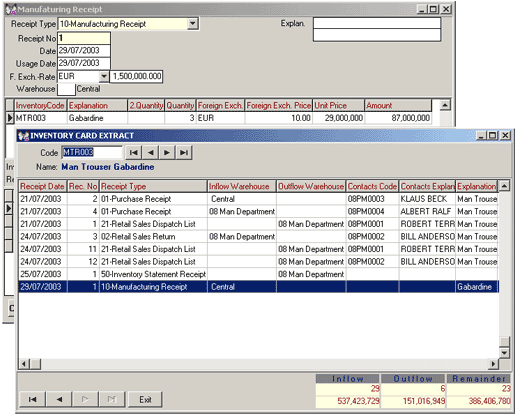
Figure
13 Manufacturing Receipt / Inventory Card Statement
Statement of the inventory can be displayed on the manufacturing receipts
by either pressing the SHIFT+F4 key combination or clicking the statement
button on the inventory line, for which the statement will be displayed.
PENDING ORDERS ON THE MANUFACTURING RECEIPTS
Existing Pending Orders of an inventory can
be displayed on the manufacturing receipt in the SentezShop
program without leaving the receipt. In order to execute this operation,
display the Orders List on the screen by clicking on the Pending Orders
option, which is displayed by either pressing the Ctrl + F1 key combination
or right clicking with the mouse on the inventory line at the manufacturing
receipt.
BULK
LOAD MANUFACTURING OPERATION
In
order to start bulk load manufacturing operation, click the Start
button. If the Filter button is clicked before starting the operation,
products to be manufactured can be listed by making limitations on the
basis of receipt types or fields such as Date, Current Account, Warehouse
Code etc.
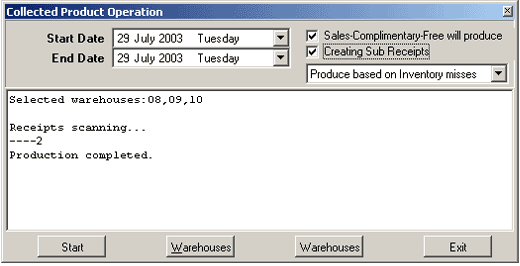
Figure
14 Bulk Load Manufacturing Operation
If the Start button is clicked after making the necessary limitations,
a warning message is displayed on the screen as the following: Start
Bulk Load Manufacturing? If this warning is confirmed with the Yes
option, manufacturing operation is started and finished.